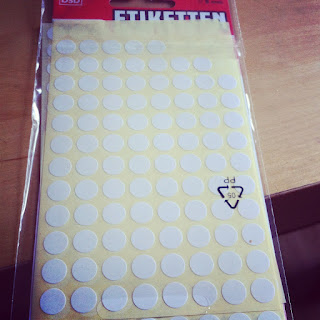
So, as you may remember from this post, the half moon nail trend is something that I've been wanting to try for some time now and I decided to give it a go after I randomly went into a stationary shop and found some perfect stickers for the job (trust me, trying to do this freehand simply won't work!). I decided to go for red nail varnish for the true retro vibe, but if you're worried about little mistakes showing up (and they do) then I would go for a paler colour. So here is how I did it and my results:
1. Stickers are essential - the ones I used were OK but in hindsight maybe some slightly bigger/wider ones would have been better.
2. Stick over the bottom part of your fingers, making sure you get a nice even arch, not one that is too high or it will end up looking odd. A good guide is to look at the natural part of your nail where that little white area is. Make sure they're stuck on well.
3. Paint your nails with your favourite nail polish, and obviously it doesn't matter if you get some on the stickers because they'll be coming off anyway! After that, patience will be your biggest friend. You really have to wait for the nail varnish to dry completely before you remove the stickers, otherwise you'll be left with a gloopy mess and uneven arch. Carefully peel off the stickers from top to bottom and, hopefully, you will get the desired result. Mine wasn't perfect, but I think it was pretty good for a first attempt.
My top tip would be to have some cotton buds handy and, after dipping them in some nail varnish remover, correct any mistakes or stray bits of nail varnish after you've removed the stickers.

What do you think? Will you be trying this nail trend out? I can't wait to try it with some other colours, or even doing a dual-tone version, where the bits left white are filled in with another colour.


No comments:
Post a Comment